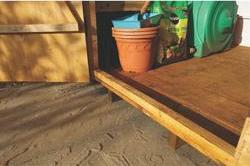
A solidly built and properly maintained storage shed can last for decades, provided that the underlying foundations are constructed soundly. A good, level, solid foundation with plenty of drainage is vital to getting the best value and longer life from your shed. Putting in this extra effort at the foundation stage really is worth it, and our easy-to-follow guide will show you how.


Preparing the Site
- Measure out your site, making sure that it's a few inches larger than your shed construction, ensuring that you measure precisely to ensure that your area is perfectly aligned. Use a long coil of durable string and some wooden stakes to stake out the are, then start to dig it out. Additional digging may be required to remove roots, stones and vegetation, and be sure to leave a 4-6 inch drop to accommodate your gravel base, which will provide your foundation with ample drainage. You'll need to level the ground here to make it as flat, solid and compact as possible.
- Create footers - narrow ditches dug out along the front, back, and both sides of the area. These ditches along the outer rim of your foundation are designed to give added stability, taking in extra concrete in order to bear the major load of the shed. If your area is fairly small, digging out footers can be achieved easily using a shovel and pick or backhoe.
- Next you need to pour in gravel to a 4-6 inch depth, and compact down to create a firm drainage base.
The Foundations
- You have several options when it comes to the type of foundation you want to lay. If the ground is particularly hard, no extra concrete will be required. However, for softer soil, poured concrete is one of the most cost-effective and longest-lasting types of foundation available. If you're looking to keep costs down, shop around online for your cement mix. Online is where you'll find the best deals, with Wickes currently offering 25% off cement mix and aggregates when you buy in bulk.
- Before pouring, you'll need to create the form for your slab using two by fours or two by six pieces of wood. Each board needs be as long as the width and length of the area - don't be tempted to nail shorter planks together in order to reach, as this will create weakness in the construction.
- Lay down the planks to form the base of the slab, nailing them together securely at their corners with ten penny nails. Then it's time to pour in the concrete.
- If your shed is a large one, or your concrete slab will be particularly thick, then before you pour your concrete, you'll need to set down rebar, which will reinforce the concrete, prevent cracks, and increase stability. There's a useful guide to rebar installation here.
- For smaller areas, and hard ground, cement mix may not be required. Instead, you can create a solid, level foundation by using a skid constructed from pressure-treated 4-by-4 skids, or concrete blocks.
- If using concrete, level out using a trowel or long two by four plank, wait for the concrete to set, and you're ready to build.
